


What is bushcraft, the dictionary defines it as “skill at
living in the bush”. So driving your $400K
motorhome to a national park, plugging in, and
setting up is bushcraft, or so it seems. Bushcraft is
definitely more than that, to me bushcraft is living
and thriving in the bush with what you can carry in on
your person. Bushcraft involves all the skills and
aspects of camping, hiking, and survival for an
indefinite amount of time. However, bushcraft is
more than just camping, hiking, and survival, it
involves starting with the minimum and improving
your living conditions on a daily basis using what
nature provides. Bushcraft means crafting shelters,
tools, obtaining food and water, fire and other implements that allows you to create a more comfortable
existence in the outdoors with the minimum of modern conveniences, using primitive skills.
Take something as simple as fire, simple but necessary. Necessary for cooking, purifying water, and that
can be used as a tool. Bushcraft is not running in to town when you’re out of matches or your lighter fails
to work. Bushcraft is the ability to start a fire using more primitive methods such as friction, or by striking a
spark using flint and steel, then nursing it into a flame. That is what bushcraft is to me, plain and simple.
This is my basics of bushcraft “primer”, on
suggested bushcraft supplies, equipment and my
personal thoughts on getting started bushcrafting
for those interested. I will cover more advanced
bushcrafting later in this column. In my opinion
bushcraft is a combination of skill, wisdom and
intelligence, and tenacity, and you must use them all
in order to succeed. Manual skills are important,
but if you don’t know what you’re doing, you may
fail. You need the tenacity to keep trying and
improving at your attempts until you do succeed
and then remembering exactly what you did and
how you did it for the next time. Like any other
lesson or skill in life, the more you practice, the
better you get. The better you get, the easier it is
and the more you can do. With that being said, you must prepare yourself to have a fighting chance of
succeeding at bushcraft. Don’t go out without a backup, it’s not a bad idea to have a lighter or matches
along just in case, but don’t make that your go to solution. Prepare a proper bushcraft kit, containing the
items that’ll you’ll need on your adventure. Your kit should include an emergency shelter and other survival
supplies that you may fall back on in the worst case scenario. Start simple and add to it as you deem
necessary, even the most prepared may occasionally encounter issues so it’s always a good idea to have
it along at all times, regardless of your skill level.
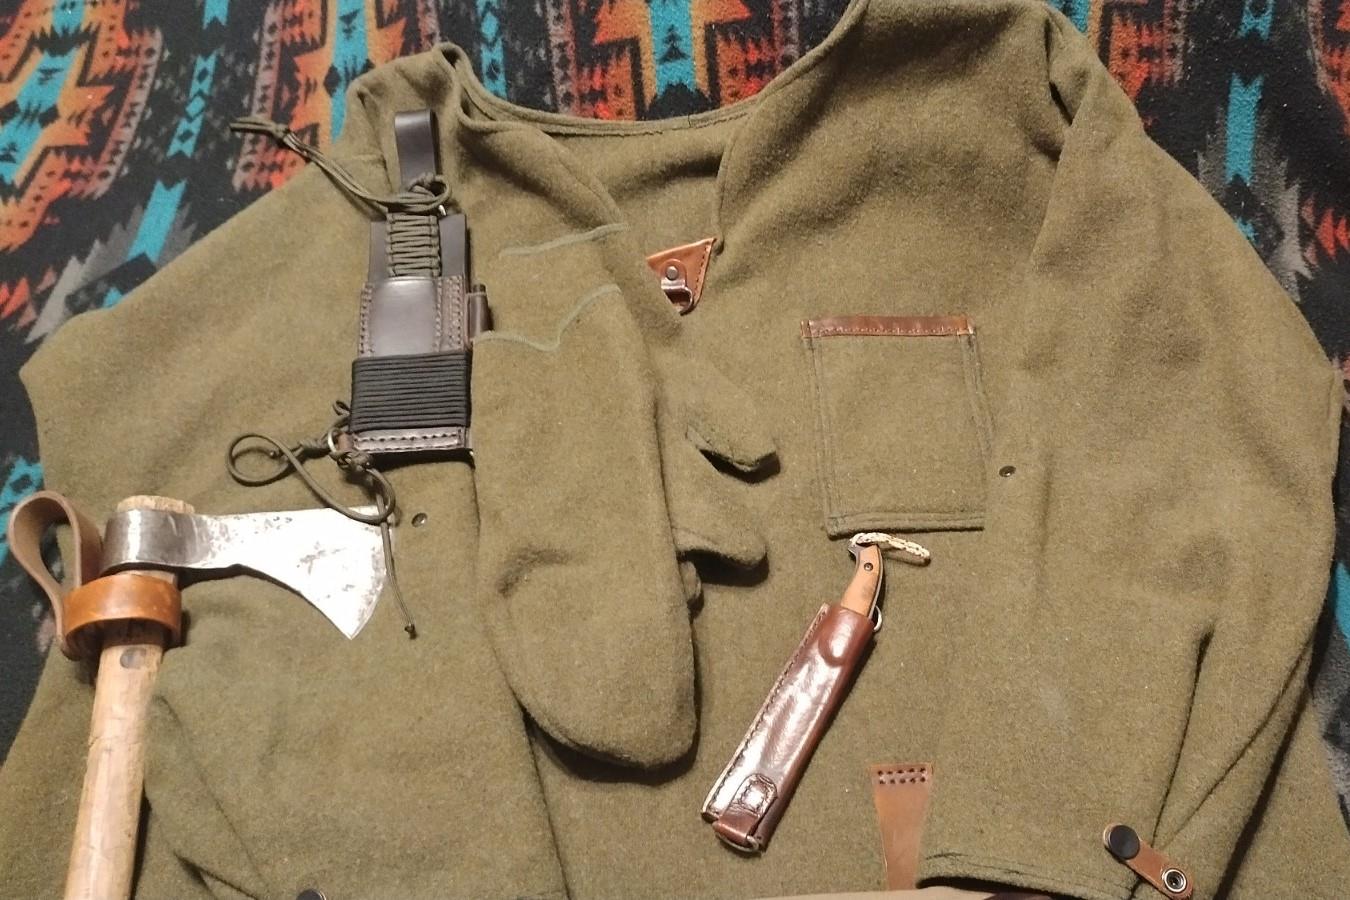
Your back up kit should include basic bushcraft tools and supplies and the means to enable you to create
an emergency shelter, fire, locate directions, signal for help, procure water, keep you warm and dry, apply
first aid, and to provide some sort of nourishment. I would suggest keeping your back up kit among your
bushcraft kit. Let’s start with the basics, the shelter.
The first shelter available is what you are wearing,
so dress for the climate. If it’s cool and wet, my first
choice is wool garments. Wool offers good
insulation and retains insulation even when it’s wet. A
shemagh (a multipurpose scarf) is a considerable
asset when bushcrafting, able to be used for
filtration, warmth, as a tote, dust mask, sunshade
and much, much more. Always include a head cover
and gloves to help keep you warm, or to shade you.
Gloves will keep you warm and provide protection
to your hands, you’ll be working with them a lot.
Choose high quality comfortable socks and boots
as you’ll be on your feet a lot bushcrafting. Boots
that provide ankle support, that are waterproof and
breathable are the best choice. Oilskin slickers,
jackets, and tin pants are a good choice for bushcrafting, being tough and water resistant. Your most
basic shelter other than clothing would be a waterproof tarp. Waterproof tarps range from ultralight
Dyneema to heavyweight treated canvas, each having their own pros and cons. Dyneema, while being
light and strong, isn’t particularly puncture resistant, treated canvas is much heavier, but can be used as a
ground cloth, can be used as a bag or fashioned into a pack to carry equipment, used as an improvised
hammock, bedroll, tent, roof for a structured shelter, lean-to, water collection, and has a much greater
array of uses.
Having an ample supply of cordage would be next on my list. Cordage can be used in conjunction with the
tarp making it more functional by using it to make ridgelines, guy lines, and tie outs. The cordage can
also be used to bundle and create packs, hanging items or lashing and securing items, lashing shelter
structures, and depending on the type of cordage as a fire tinder, fishing line, net making, snares, or
even for first aid. I personally carry paracord, #36 bank line, and jute cordage waxed with pure beeswax
and occasionally rope of some sort to get the most use out of the way I use cordage.
Some may disagree with me on the order in which I
place the necessities, putting fire at the top of the
list, but if you are properly dressed to stay warm
and dry and have a shelter, you can exist for a night
or two without a fire. Granted a fire may provide
some mental comfort and some warmth, but if you
are cold and wet, you’re going to be miserable no
matter what. Your fire kit should be able start a fire
even when wet, but again there are pros and cons
to whatever method you should use to contain it. A
metal tin can be used to carry the fire kit and can
also be used to make char cloth, but metal tins
aren’t the most watertight containers. Depending on
the size of the tin, you may decide to use it for an
improvised cup, a cooking or boiling pan, mess kit,
or other use. Plastic containers are often more
watertight, and can be used as a cup, but falls short
in the other areas. Your fire kit should have at least
3 forms of ignition for starting a fire including your
back up. Flint and steel, Ferro cerium (Ferro) rod and striker, hurricane matches, lighter, fire roll,
magnifying lens, fire piston, or other proven type of ignition device are all good choices and handy to
have at hand. The fire kit should include some sort of fire starter and tinder such as char cloth, cotton
balls dipped in petroleum jelly, fatwood shavings, wood wool, or Birch bark. Basically anything that
catches spark and can be coaxed into flame, yet burns long enough to start a fire even if the wood is a bit
damp. A note to make mention of and remember is to prepare all your fire materials before striking a
spark. Having tinder, kindling, and processed firewood ready is first and most important part to getting a
fire started. Form a “bird’s nest” of tinder to catch the spark, blow or coax it into flame and slowly add
more tinder until you can start adding the kindling. Add the fuel for fire starting with the smallest sticks and
increasing in size as the fire grows. Keep any damp wood close to the fire in order to help dry it out and
make it easier to get started later and to keep the fire from being so smoky. Although a little smoke from a
fire does help keep the mosquitoes at bay.
Unlike camping or hiking, bushcraft is not an
ultralight endeavor. One of the advantages of
bushcraft is that if successful, you have managed to
create a more long term semi-permanent camp that
you may use for several seasons. Ultralight or
lightweight equipment under normal conditions may
not hold up the stress and strain of continual use.
It’s akin to choosing flip flops to walk across the
desert, they’re not designed or constructed for that
kind of use. While being absolutely wonderful for
hiking or camping, lightweight or ultralight cooking
ware may not hold up to the rigors of heavy
everyday use or the strain and stress of being
plunged into or over a campfire. Cast iron Dutch
ovens, skillets, and pots are ideal for long term use
in the outdoors, and if taken care of and used properly, will last a lifetime. Lightweight cook ware can be
used while creating your bushcraft camp and on shorter bushcraft adventures. Make sure your cast iron is
seasoned before use and re-seasoned as needed, this will assist in keeping the cast iron from rusting as
well as keeping foods from sticking as much. Along with the cast iron cookware, you may consider
having a wrought iron cooking tripod or spit to cook with or hang your cookware over the fire. Heavy
stainless pots work well for boiling water and cooking soups or stews in and will last a good long while. I
have found that heavy stainless steel cooking utensils used for barbeques work well for bushcrafting and
are strong enough to stand up to heavy daily use. Stainless steel dishes such as plates, cups, and
flatware are fine for eating from and are normally easy to clean and can be sterilized by holding over an
open flap for a short period of time. Storage containers for spices and other kitchen supplies can be
metal or plastic, plastic being more moisture proof and rust free in the outdoors, but may crack, warp, or
become brittle over time. Glass can be excellent for storage allowing you to see the contents, with the
single biggest downfall being breakable. Stainless containers that seal are a very good choice for long
term storage being air tight, rustproof, unbreakable, and mostly “gnawproof” from rodents and other
critters that may visit while you’re away from camp. While it may not be feasible to carry a hundred pounds
of cast and wrought iron to your camp at one time, it can be hauled in on a few consecutive trips to the
camp over time.
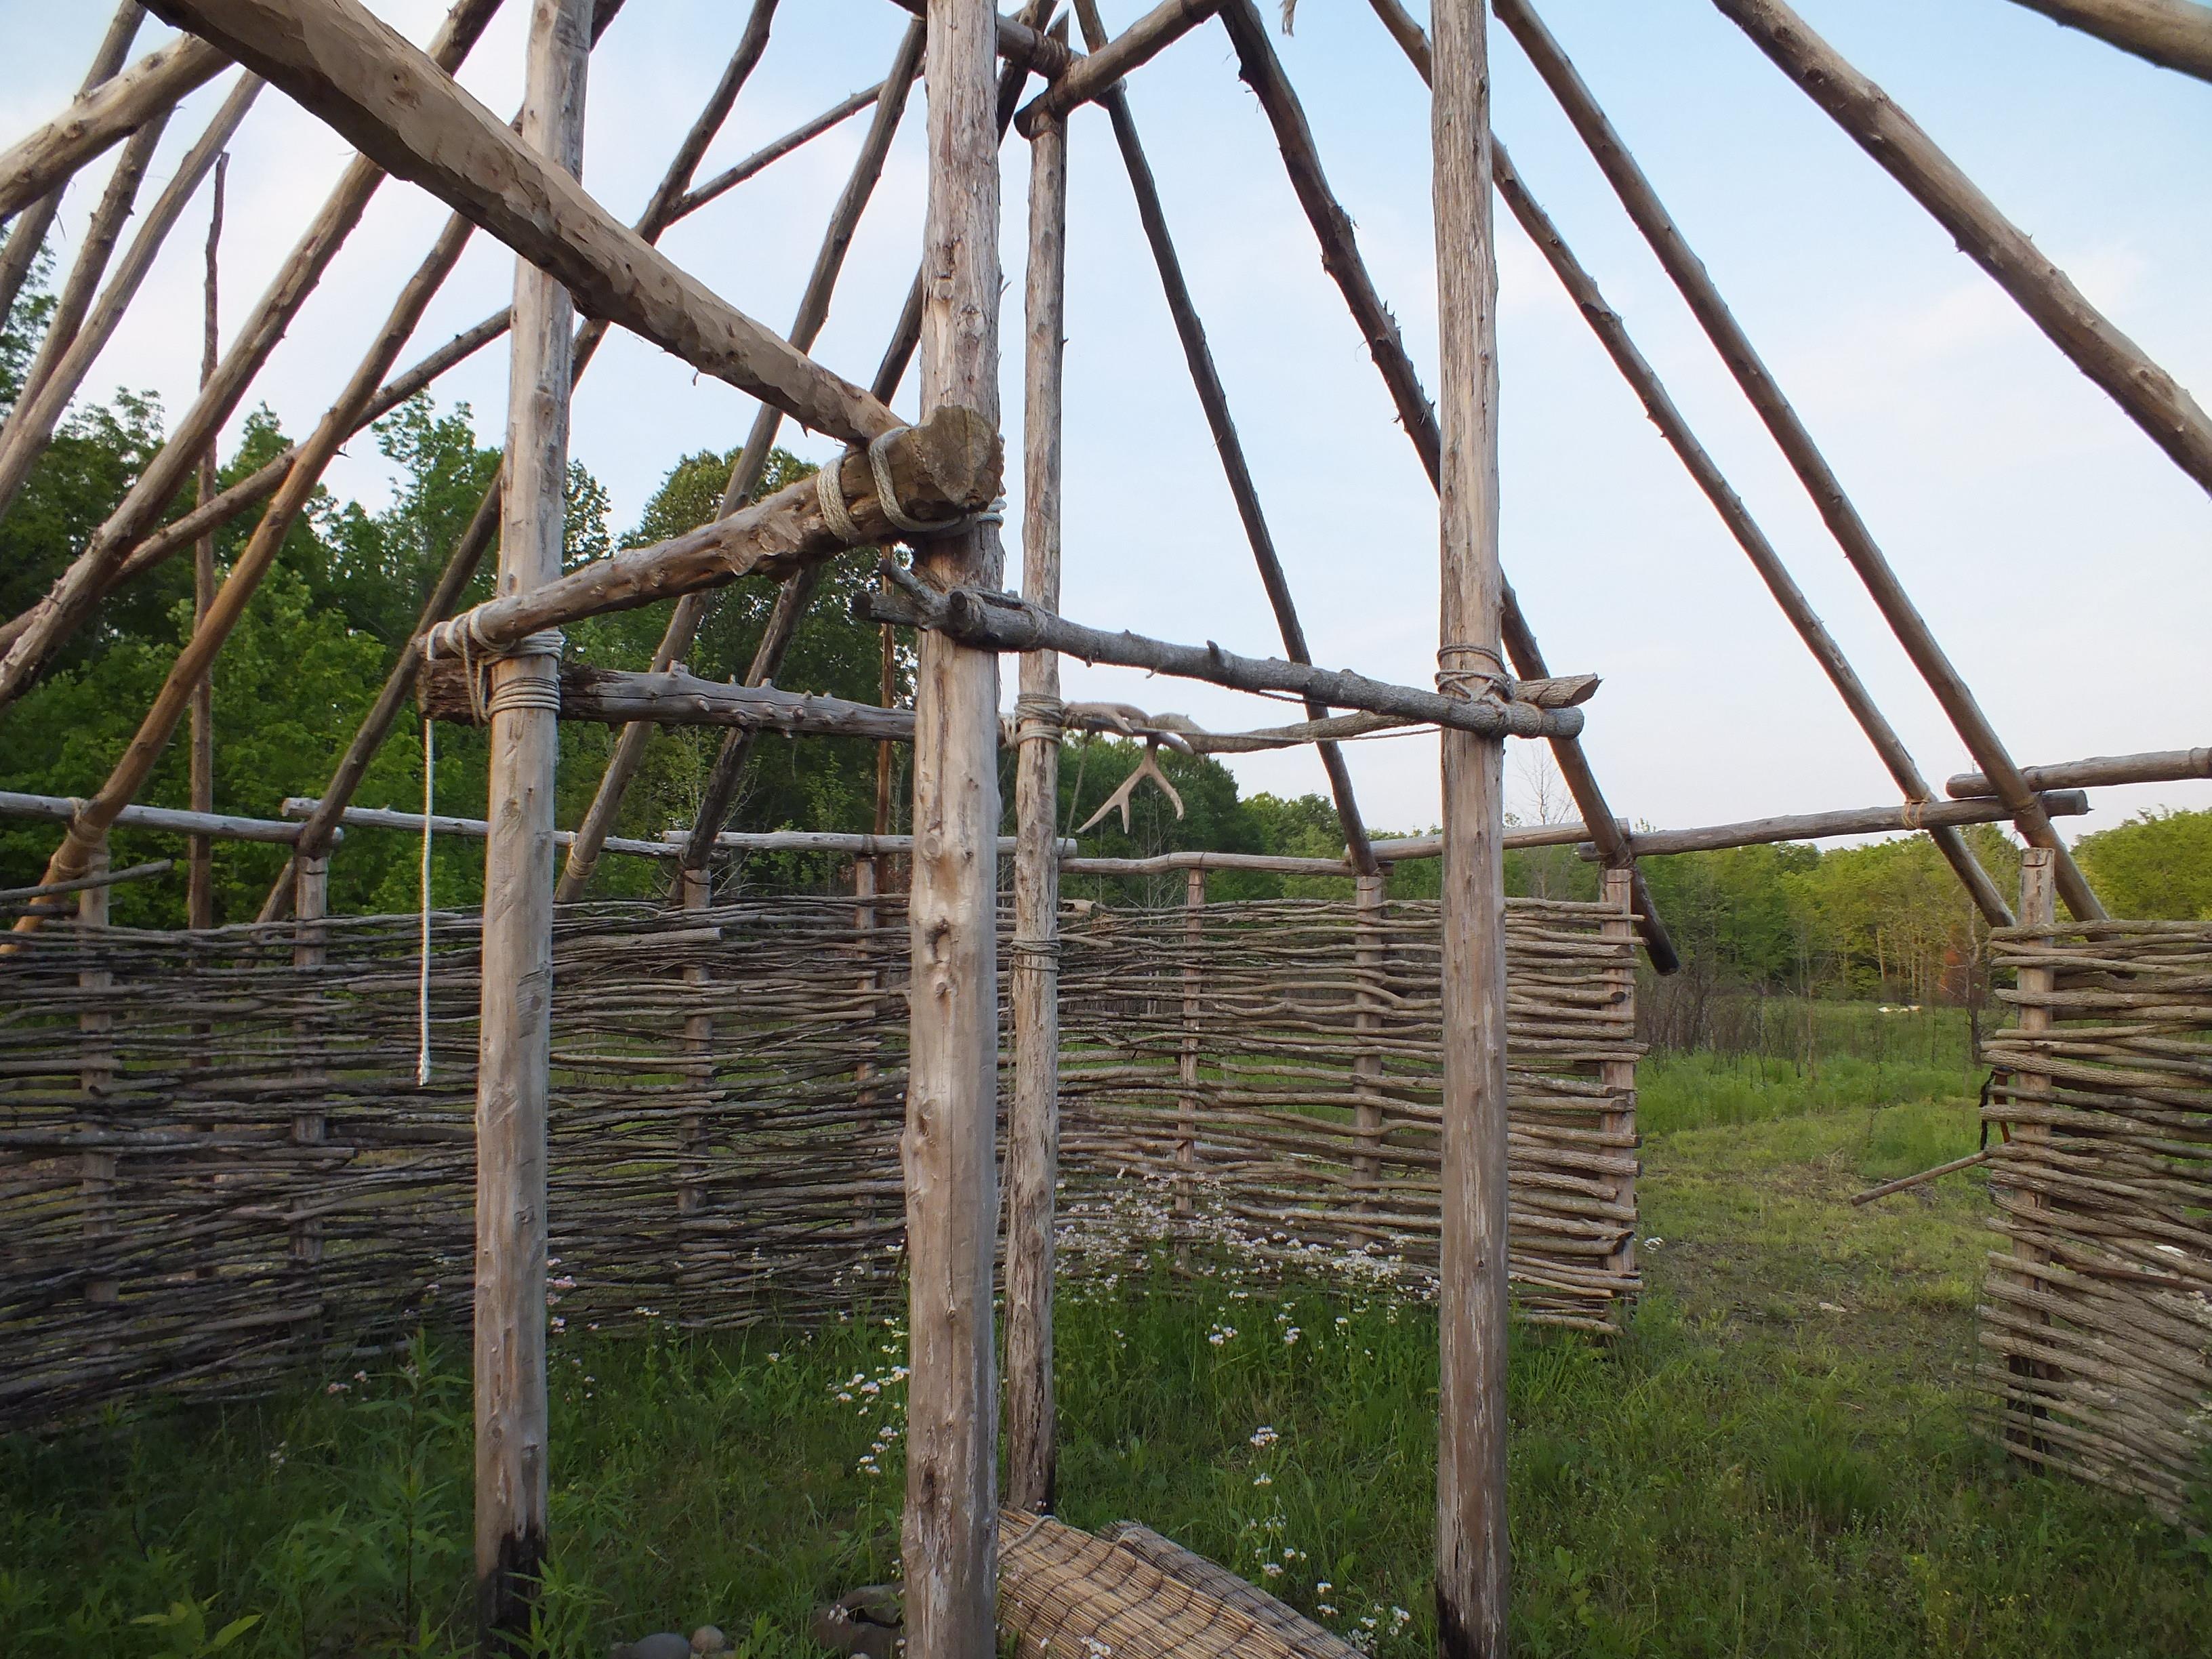
One of the advantages of a bushcraft camp is
finding out how multipurpose your bushcraft
equipment can be or become. As mentioned above
tarps have many uses and purposes as does the
cordage or different kinds of cordage you may
carry. Cooking pots can be used to haul and store
water and other edibles. Fire can be used for
warmth and used as a tool for clearing an area if
used carefully, or used to hollow out wood for
making cups and bowls or projects as large as
burning out a tree to make a canoe or pirogue.
However although useful as they may be, you
wouldn’t want to use a tarp for a long term shelter or
use your stainless steel cup or pots for digging
jobs daily. The goal is to make a camp that is
semi-permanent and that will last for several seasons that will provide shelter and allow you to store your
bushcraft tools and supplies there as well. Start with a temporary shelter that will provide you with a place
to rest, sleep, eat, and provide a place to stay while working on your semi-permanent camp. The ideal
location for a long term camp is near water, easily accessible, yet protected from winds and weather.
With a temporary shelter in place, create a fire/cooking area where you can cook or enjoy the fire while
resting or taking a break. After the cooking area is created, start building and creating camp furniture and
conveniences for the camp. Keep in mind that some of the furniture and other items that you build may
need to be portable enough to move to the long term shelter, while other conveniences need to be more
permanent. For a couple of different examples of each type, let’s consider a raised bed or a stool. The
raised bed or stool may eventually be moved in to
the long term shelter for use. They should be well
built and sturdy enough to last a long while, but
portable enough to transfer to the long term shelter
without having to rebuild them. On the other hand a
bench or shelf near the cooking area that’s not
going to be relocated or moved can be well built
and permanently constructed in place. Think about
where and how your long term shelter will be placed
and the purpose it will serve. There are many types
of long term shelters that you can build from
dugouts to log cabins with fireplaces, earth boxes
(basically an insulated or non-insulated hole in the
ground at a depth that will keep food cool and help
preserve it), and fully furnished with all the amenities of modern living, each have their own advantages
and disadvantages and requires different skill levels to construct. Not knowing your personal needs or
goals, I’ll leave that choice and research to you. The end goal however is to have a shelter that will last a
long time, provide shelter from the weather, give you the feeling of security, and provide the amenities
you desire. Keep in mind you can and do want to constantly improve your camp and shelter, you may find
using discarded building materials and repurposing them or even purchasing items such as metal roofing
or plywood to create your shelter or camp is completely acceptable. I personally think learning the basic
bushcraft skills such as fire starting, food and water acquisition, shelter building with natural materials
more suits my style of bushcrafting and may assist me in the short term if I am caught away from home or
the semi-permanent camp for some reason.
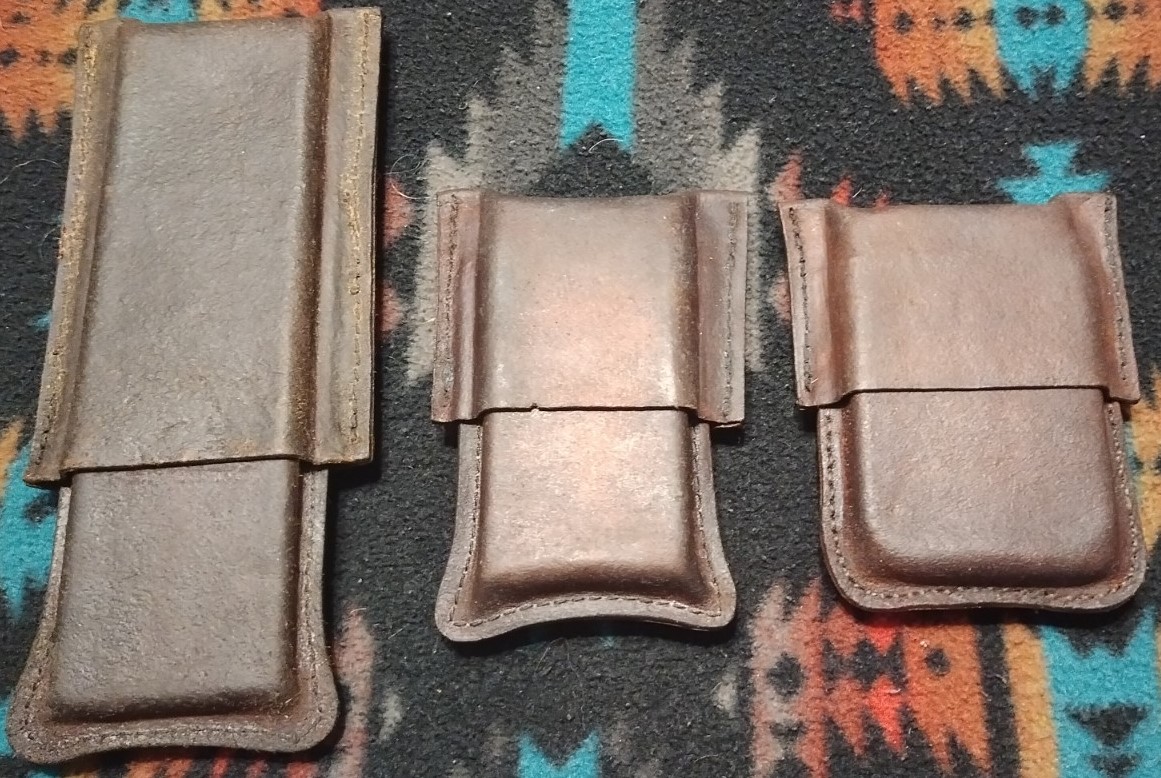
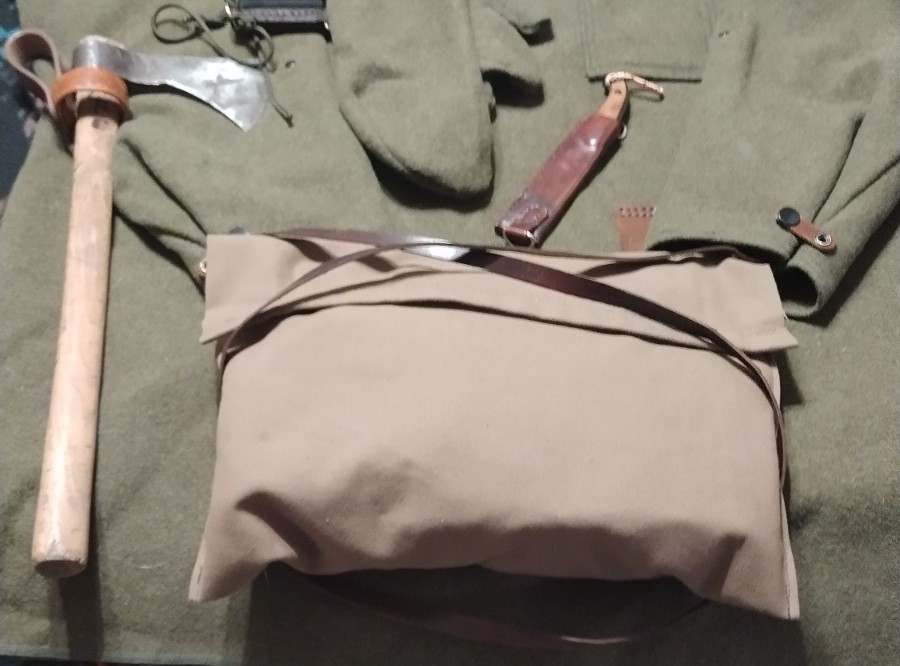
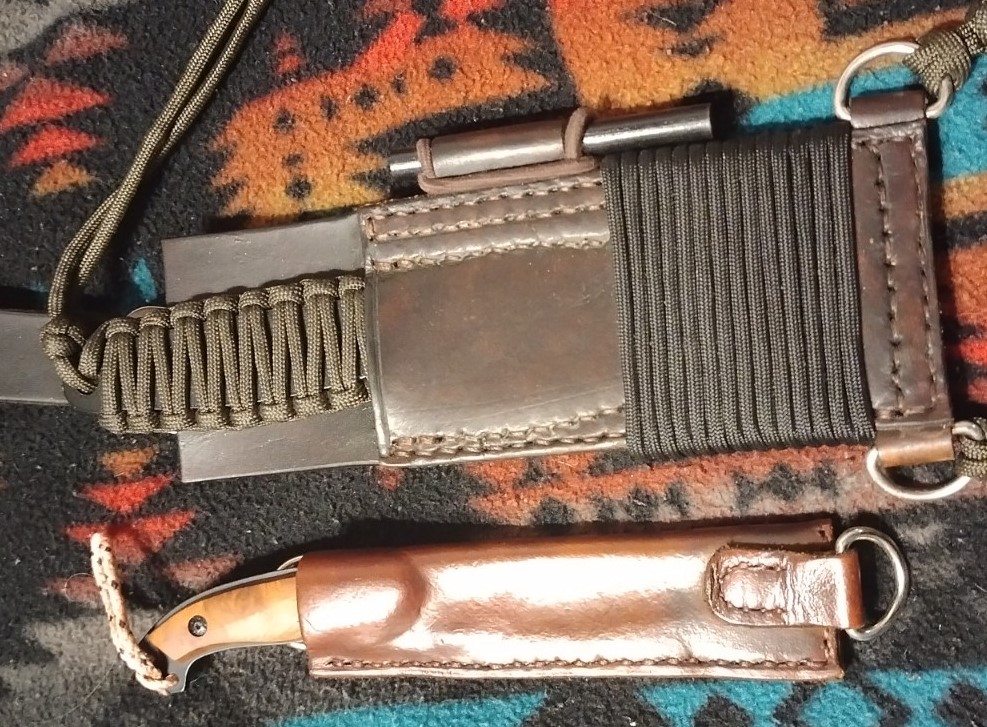
Tools for bushcrafting may be as varied as the folks
using them, and consist of a variety of knives,
machetes, hatchets, axes, saws, hammers, picks
and shovels, hand drills, awls, adz, froes, augers,
and many other specialized instruments and
implements that have been used thru history. At the
minimum I would choose a well-made knife, saw,
and some sort of digging tool, matched to its
intended use. On one occasion I visited a long
established bushcraft camp that had gone as far as
to have a working hand crank forge and anvil on
hand. Some tools can and will be fabricated as you
go along depending on your needs. Tools such as
wooden mallets, bow saw frames, and batons can
easily be fabricated in the field. Match your tools to the job at hand for the task you need to accomplish. It
doesn’t make sense to attempt to process firewood with a 3” penknife or to use a 30” bowsaw to
process tinder. Having an assortment of tools on hand will make your job easier and safer. I normally
adhere to the 200% rule, if batoning a 3” piece of firewood, use at least a 6” blade, if cutting a 6” tree or
limb, use at least a 12” saw, so on and so forth. The same of course doesn’t apply to machetes, axes, or
hatchets. Learn the tools and how to use the tools correctly and above all use common sense. When
thinking about the tools mentioned above, they are not the only tools you should have or will use
bushcrafting. Other tools should include tools for orienteering, procurement of wild game or fish, repairs
and maintenance, a firearm, sewing, gathering wild edibles, snaring or trapping, signaling, marking and
measuring, marking and writing, trail marking first aid and survival. Most of which you will prefer to carry at
all time when outdoors.
So you’ve decide you are interested in bushcraft
and would like to try it. The first step is to make sure
you have a location on private property, preferably
that you own. The camp should be easily accessible
to you and those that know the location, but is well
concealed from public use. Do not bushcraft on
public property, it may very well get you in trouble or
have your camp torn down or your stuff removed
either by authorities or by those that stumble on your
camp. Once you’ve located the place for your
camp, think about how you are going to use the
camp, will it be for weekends and overnighters or for
stays of a week or more? Are there ample
resources available in the area such as water, wild
edibles, dead fallen or standing wood for fires? Is
the area protected from natural events, such as flooding, erosion, land or mudslides? I would suggest
you scout multiple locations for your camp and choose the best location that fits your needs, even if it isn’t
your preferred choice for one reason or another. Check your tools and supplies that you will be using to
create the camp. Remember you may need to clear or clean up the camp location, and depending on
how much work there is to do, that you may have to make more than one trip to get started. This may take
several days to get the camp location ready for use so start with the basics required to get the job done.
If you plan on camping at the location while clearing it, make sure you have a tent or shelter that you can
spend the night in or shelter under if the weather changes. Clear a small area for this purpose first. Along
with your overnight supplies; water, food, shelter, first aid, EDC, and survival items, you may need a saw,
hatchet, axe, or machete to clear the area. As the area is becoming more usable, you can modify what
you need to have or carry to the camp. You may also find it useful to cache some of the tools or supplies
that you are using at the camp. Having decided how you are going to use the camp, there are some
decisions to be made. If you only plan to use the camp for one weekend a month using a tent for shelter,
there may not be a need for a semi-permanent long term shelter, so you can concentrate on your
fire/kitchen area or some camp furniture such as a bench or stool. Unless you want to spend a lot of time
cooped up in a tent, you’ll eventually want some
other form of shelter such as a lean-to that allows
you to escape the weather while working on
projects, relaxing, cooking, etc. You may also want
to fabricate a raised bed or cot for the lean to that is
high enough to sit on as well as a place to rest,
nap, or sleep. If you plan on using the camp on a
regular basis or for extended stays you should start
working on the long term shelter and other
amenities to make camp life easier. Again think
about the type of shelter you want, and how to
furnish it before building it. Once the shelter is done
or at least well on its way, you can start bringing in
the cast iron pot and pans, storage containers,
cooking tripod or spit, and anything else you may
want or use at camp. Once your camp is to this point you should be able to stay comfortably carrying in
only minimal supplies each trip. If you find yourself carrying in the same thing each trip, consider leaving
those items at camp or buying those or similar items that can be left at camp. Traveling easily and light to
and from camp will make camping more enjoyable and you’ll be more apt to go to the bushcraft camp.
Carrying a Dutch oven, axe, saws, machetes and other heavy stuff every time you go will take a toll on you
and is likely to dampen your spirits just thinking about packing it in an out. The most important part of
bushcrafting is enjoying the camp and time outdoors, don’t over complicate things.
Although your thoughts or needs may differ from my own, I hope I have given you something to think
about and maybe coaxed you into bushcrafting if you were undecided. Bushcrafting is very enjoyable,
even the work involved is enjoyable and rewarding to be able to look upon what you’ve created with a
minimum of tools and the comforts it provides.